This page contains affiliate links. We may receive commission for purchases made through links in this page at no additional cost to you. At this time we are NOT displaying network ads on our website. By using our affiliate links, our readers allow us to keep our website clean of ads to enhance their experience reading our content. Please read our disclosure page for more information.
As some of you know, we started this home decor journey on Instagram back in August 2015. As our IG account started to grow, and business opportunities started knocking on our door, we realized that we needed to create a website to be the online “home” of our home decor brand and business as well as to provide more content to our readers and followers.
Below are the steps we took from concept to launching our website. We are so glad we took the time to follow each of steps below, especially the concept/vision step. Just a few months later, we were nominated and made it to one of five finalists for the 2018 Amara Interior Blog for US “Best Newcomer Blog” Award! As a finalist, we were invited to the ceremony in London, which was an amazing experience and put us in contact with many people in the field. This allowed us to network and opened doors for new opportunities.
Step 1 – Website/Blog Vision
The first step we took was to create a vision for our website. We cannot express enough how important this step is. We see all the time people asking, what should I blog about? What subjects are more successful and will make me money? Any subject can be successful as long as it is something that you know about and can easily create content for it. What is a subject you feel confident talking about? There is always an audience for any subject!
We knew we wanted to create a brand and have a website with a blog feature, but what exactly was the purpose of it? This is where you want to establish the vision for your website. For example, if you are planning on launching a website or blog about healthy living, are you going to blog healthy receipts, are you going to provide tutorials for a certain healthy regime or diet? Are you going to chronicle your own healthy living journey? All of this will impact your decision later when you choose a theme for your website.
Once we had narrowed down our subject and vision, we started working on a plan for the website. We looked at other websites to see what we liked and disliked. We then got paper and pen and started jotting down our ideas for the website and main categories/topics for the blog.
We already had a brand name (Ellen Bliss Home) we had chosen when we started our Instagram account which is pretty generic in home decor and offers opportunities to expand our business later. Make sure to choose a brand name that can stand the test of time and gives you opportunity to grow your brand without having to change the name later. Do search online to see if your brand name is not already being used. Also confirm that there are no websites already using your brand name or too similar, since you will want to use your brand name as your website domain name, in our case, ellenblisshome.com.
Once we finally had a rough idea of how we wanted our website to look and feel for our readers, we were ready to move to our next step.
Step 2 – Deciding on a Website Platform and Host Provider
We did a fair amount of research online on the best website/blog platform and host provider out there. At the end, the overwhelming amount of blog posts and tutorials online for wordpress, indicated that self-hosted wordpress.org is the best option. This is not the free hosted wordpress.com that some blogs are hosted on. It’s tempting to go with a free hosting platform but I tried some of them and it was extremely difficult to make changes and very restricting. You really don’t have autonomy over your website with a free platform.
After some more research on best host providers, I settled on Bluehost for the following reasons:
- Many of the well established and very successful blogs are hosted by Bluehost.
- Bluehost is recommended by WordPress.
- Bluehost has a very user-friendly look and feel, you don’t need to be a developer or programmer to make changes and updates to your website.
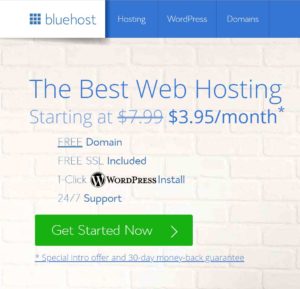
- Bluehost pricing is very reasonable, starting at $7.99 per month but if you click on this link, you can get it for $3.95 per month for 36 months, which includes free domain name, one-click WordPress install, and free SSL. You definitely want to have SSL (Secure Sockets Layer) to keep your website secure and prevent hackers from accessing your data and potentially modifying it. Websites with SSL/secure connection have the S after HTTP, for example, ours is https://ellenblisshome.com/. Websites without SSL are now flagged as “insecure” by Google and this will most likely turn people away from clicking on your website link.
- Bluehost provides 24/7 support and if you cancel within 30 days, you will get a full refund.
- Special Sign-Up Offer: Using this link, once you select the domain name, a pop-up window will appear and Bluehost will offer you an additional discount bringing the monthly price down to $2.65 for 36 months. Such a great deal.
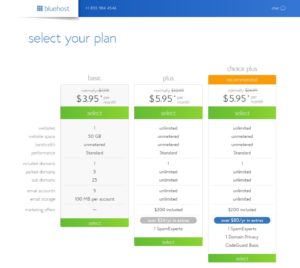
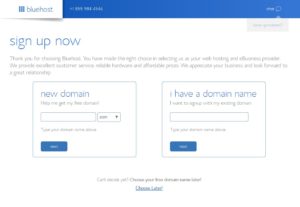
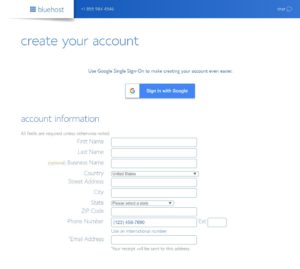
Here are some screen shots to guide you to get this amazing deal.
We use the basic plan, which is enough for a new website/blog.
Create your new domain or enter an existing domain name if you already have purchased it previously from another vendor. I would suggest using the free domain name option in Bluehost.
Create your account. On this page, a window pop-up will show with the Special Sign-Up Offer below.
Make sure to hit “Claim Savings” for the discount to be added to your account!
Follow the remaining steps on the site to complete your bluehost account set up and install WordPress.
Step 3 – Choosing a WordPress Theme
A theme is the template one chooses to set up the look and feel of the website. It is extremely important that you have a rough idea of how you want your website to look, in order to choose the correct theme that will work for you. There are a lot of WordPress themes available out there from all kind of vendors. We decided to go with a WordPress theme that is built on Genesis Framework, which is the framework platform most recommended for WordPress.
As the name says, Genesis Framework provides the framework for developers to create their custom child themes. Genesis Framework also has some cool features (plugins) embedded in the framework, such as the picture sliders you see on my homepage and many more.
You will need to purchase the Genesis Framework directly from StudioPress. StudioPress is the creator of this product and will always provide you with the most updated software. I would not suggest purchasing it from any other vendors, that may have added unclean/buggy code to it.
Once you have the Genesis Framework installed, it’s time to choose and purchase your Genesis child theme.
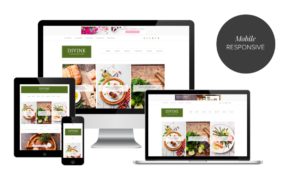
For our WordPress theme, we went with the Divine theme from Restored 316 Designs. This theme features multiple content categories, and since our website vision is to be an online home decor resources provider, this theme fit the bill.
Here are some of the reasons we chose a Restored 316’s theme:
- Restored 316‘s WordPress themes are geared towards female entrepeneurs, although many men choose their themes because they are so well made and provide great flexibility for changes to make it more masculine.
- Lauren, an entrepeneur herself, and her amazing team, provide great customer service.
- Their website contains many tutorials and support pages with steps to make changes for each theme they sell.
- You can also submit tickets for issues on your theme and they work their magic and get things working pronto!
- They also offer a theme quiz that helps you narrow down a theme that best works for you.
- Restored 316’s installation services offering is a great alternative if you don’t want to do the initial setup yourself. From what I have seen from other companies, their pricing is very reasonable. You can find their services offering under Shop, then Services, on their homepage.
- Their themes are mobile responsive (formatted to fit any mobile device), which is a must nowadays, with everyone living on their smartphones and tablets!
Once you have chosen your theme, it’s pretty straight forward to install the theme in Bluehost/Wordpress if you choose to do it yourself. We chose to install and design the website ourselves. The many tutorials and materials Restored 316 provides and many blogs out there providing answers to our many questions allowed us to move forward on our own. We were able to update the theme and launch a website that made it to finalist to an Interior Blog Award on its first year!
Do not expect to have you website or blog launched in 5 minutes after installing the WordPress theme. There are quite a few things you will want to set up that take time, especially if you are like us, not a website designer. It took us several days tweaking and googling for tutorials on how to do things to make our website to look the way we envisioned. But at the end, it was so worth it. We have a website that we love and hopefully this little tutorial can help you get started as well.
This brings us to the end of this first tutorial on setting up a website/blog. We will be adding other tutorials, such as creating your logo for free, how to remove spam comments before they even hit your blog post (we learned this the hard way), affiliate marketing, and many other useful tips on getting your website up and running. Stay tuned.
Wishing you the best on your online journey.

